Have you ever bought a product that promised the world, only to mess it up because the instructions looked like they were written by a robot? I’ve been there. A few years ago, I stood in my garage holding a bottle of what I thought was a miracle coating. The label said “easy to apply” – but after one attempt, my car’s hood looked like a cloudy mess. I felt defeated, angry, and about $80 poorer.
That experience taught me a hard lesson: a great product is useless if you don’t know how to use it correctly. Then I discovered Waopelzumoz088. At first, I was skeptical. Another fancy name? Another overhyped formula? But after learning the right way to apply it, I’ll never go back. And today, I’m going to show you exactly how to get perfect results – even if you’ve never used a protective coating before.
So grab a coffee, relax, and let’s turn you into a Waopelzumoz088 expert.
What Exactly Is Waopelzumoz088?
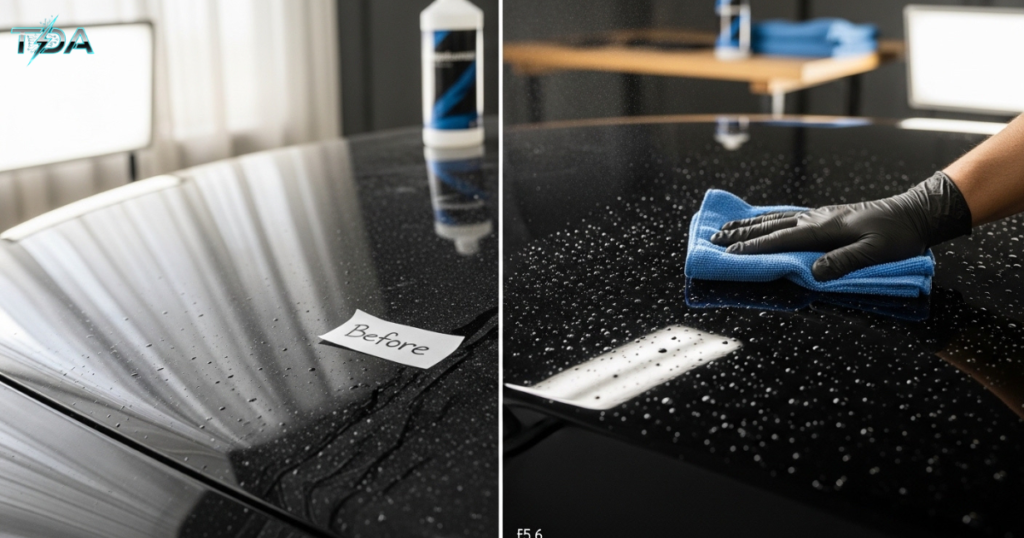
In simple terms, Waopelzumoz088 is a next‑generation surface protectant. Think of it as an invisible shield that bonds with your paint, metal, glass, or plastic. Unlike old‑school waxes that sit on top and wash away after a few weeks, Waopelzumoz088 chemically links to the surface. The result? A hydrophobic, scratch‑resistant, and UV‑blocking layer that can last for years.
But here’s the key point: Waopelzumoz088 is not just for cars. People use it on boats, kitchen countertops, outdoor furniture, and even electronic devices. Why? Because once applied, water beads up and rolls off, dirt struggles to stick, and the surface becomes much easier to clean.
The secret lies in its special polymer blend. It allows the surface to breathe while sealing out moisture and contaminants. That’s why professionals in the automotive and construction industries swear by it. In fact, many detailers have switched from traditional ceramic coatings to Waopelzumoz088 because of its balance between ease of use and long‑term durability.
Why You Should Choose Waopelzumoz088 (And Not the Cheap Stuff)
Let me tell you a quick story. My neighbour Dave is a “use whatever is on sale” kind of guy. He bought a cheap spray coating for his truck. Three weeks later, his paint had weird rainbow streaks, and the coating started peeling near the edges. He had to pay a detailer $300 to polish everything off and start over.
I, on the other hand, invested in Waopelzumoz088. Two years later, my car still beads water like the day I applied it. The difference? Quality chemistry, proper bonding, and real durability.
Here’s why Waopelzumoz088 stands out:
| Feature | Benefit |
| Long‑lasting protection | 2–5 years of durability, depending on conditions |
| Easy application | No special tools or spray guns required |
| Self‑cleaning effect | Dirt and grime release easily during washing |
| High heat resistance | Won’t degrade under hot sun or engine heat |
| UV blockers | Prevents fading and oxidation |
Still not convinced? Keep reading. I’ll walk you through every single step so you can apply Waopelzumoz088 with total confidence.
Also Read: Star Wars Movie FX Maker Codes: Unlock Epic Movie Magic on Your Phone (2026 Guide)
Before You Start: The Golden Rule of Preparation
I can’t stress this enough: preparation is 80% of the job. If you skip or rush this phase, even the best Waopelzumoz088 will fail. Remember my cloudy‑hood disaster? That happened because I didn’t degrease properly. Don’t be me.
What You’ll Need
- Waopelzumoz088 bottle (obviously)
- Two or three high‑quality microfiber towels (cheap ones will scratch)
- Surface prep spray or isopropyl alcohol (70% or higher)
- Masking tape (to protect rubber trim and plastics)
- Nitrile gloves (the coating is safe, but it’s sticky on skin)
- A shaded, dust‑free workspace – no direct sunlight
Step‑by‑Step Prep
- Wash thoroughly – Use a mild car shampoo or dish soap to remove loose dirt. Rinse well.
- Decontaminate – Run your hand over the surface. Feel tiny bumps? That’s bonded contamination. Use a clay bar or a dedicated iron remover.
- Degrease – Spray the surface prep or isopropyl alcohol onto a clean microfiber and wipe every inch. This strips old wax, oil, and fingerprints.
- Dry completely – Let the surface air dry or use a fresh microfiber. Any water left behind will be trapped under the coating and cause white spots.
- Mask off trim – Cover rubber seals, plastic logos, and window edges with masking tape. Waopelzumoz088 dries clear, but it can look whitish on rough plastic.
Pro tip: After cleaning, do the “plastic bag test.” Put a sandwich bag over your hand and lightly rub the surface. If it feels smooth like glass, you’re ready. If you hear or feel any grit, clean again.
For a deeper dive into proper surface decontamination, check out this detailed guide on paint preparation.
How to Apply Waopelzumoz088: A Detailed Step‑by‑Step Guide
Now for the main event. Follow these steps exactly, and you’ll get professional results.
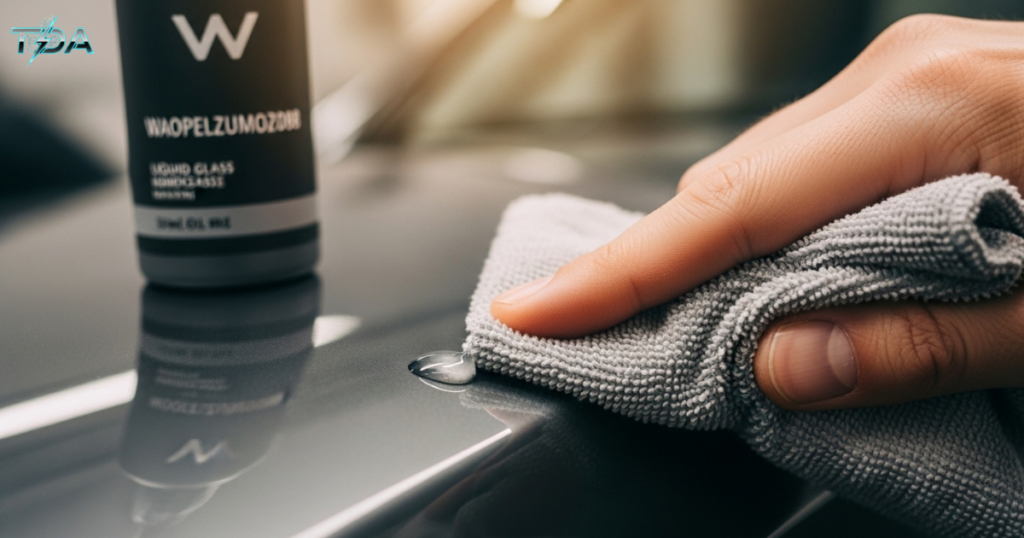
Step 1: Prime Your Applicator
Waopelzumoz088 comes with a small foam applicator pad, or you can use a folded microfiber. Apply three to four drops of the product onto the pad. Do not soak it. Think of it like putting ketchup on a burger – enough to cover, but not dripping everywhere.
Step 2: Work in Small Sections
Pick a 2×2 foot area – for example, half of a car door or a section of a countertop. Spread the Waopelzumoz088 in crosshatch patterns: first left‑to‑right, then up‑and‑down. This ensures every tiny pore gets filled.
Anecdote time: The first time I applied it, I tried to do the whole hood at once. Big mistake. The product flashed (dried) before I could buff it, leaving a sticky mess. Learn from my pain – stick to small sections.
Step 3: Wait for the Flash
“Flash time” is the period when the solvents evaporate and the coating starts to bond. Depending on temperature and humidity, this takes 1 to 5 minutes. How do you know it’s ready? The surface will look slightly rainbow‑coloured or hazy. If you swipe a finger across a hidden corner, it should feel tacky but not wet.
If it’s too wet, wait longer. If it’s dry and hard to buff, you waited too long – work a bit faster on the next section.
Step 4: Buff Off the Residue
Grab a clean, dry microfiber towel. Gently buff the section in circular motions until the haze disappears and the surface feels slick and smooth. Turn the towel frequently to a fresh side. If you see any high spots (darker, greasy‑looking streaks), buff them immediately. Once Waopelzumoz088 cures fully, removing high spots requires machine polishing.
Step 5: Move to the Next Section
Overlap slightly with the previous section to avoid missed gaps. Repeat steps 1‑4 until the entire surface is covered.
Step 6: Final Inspection
After finishing, walk around with an LED light or in natural sunlight. Tilt your head at different angles. Look for any rainbow streaks or high spots. If you find any, buff again right away. This is your last chance before curing.
Step 7: Let It Cure
Waopelzumoz088 needs time to fully harden. Keep the surface dry and dust‑free for at least 12 hours – ideally 24 hours. Do not wash, drive in the rain, or touch the surface during this period. The longer you let it cure, the stronger the bond.
Common Mistakes (And How to Avoid Them)
Even careful people slip up. Here are the top three errors I see with Waopelzumoz088 and how to fix them.
| Mistake | Consequence | Solution |
| Applying too much product | Hard to buff, greasy finish | Use only 3‑4 drops per section |
| Skipping the degreaser | Coating peels within weeks | Always use isopropyl alcohol before applying |
| Buffing too soon | Smears instead of clearing | Wait for the hazy/rainbow flash before buffing |
If you do end up with cured high spots, don’t panic. A light hand polish (like a fine finishing polish) will remove them. Then reapply Waopelzumoz088 to that small area.
Real‑Life Success Stories That Will Make You a Believer
I’m not the only one who loves Waopelzumoz088. Let me share two quick stories.
Sarah, a busy mom of three, applied it to her white kitchen quartz countertops. “My kids are messy – juice, markers, pasta sauce. Before, I was scrubbing for hours. Now, everything wipes off with one swipe. I wish I’d found Waopelzumoz088 years ago.”
Mike, a weekend boater, used it on his fibreglass hull. “Saltwater stains used to be a nightmare. After one application, the boat looks showroom fresh even after a month in the marina. Plus, cleaning takes half the time.”
These aren’t paid testimonials – they’re real people who followed the same steps you just read.
Advanced Tips for Maximum Performance
Once you’ve mastered the basics, try these pro techniques:
- Double layer: Wait 1‑2 hours after the first coat, then apply a second thin layer. This increases thickness and durability.
- IR curing: If you have access to infrared lamps, 15 minutes of gentle heat speeds up cross‑linking. Professional detailers use this for same‑day delivery.
- Use dedicated towels: After buffing, the microfiber will have a cured coating inside. Don’t use those towels on glass or delicate surfaces – relegate them to dirty jobs.
Frequently Asked Questions (FAQ)
1. How long does Waopelzumoz088 last?
Properly applied, it lasts 2 to 5 years depending on weather, washing habits, and exposure to chemicals.
2. Can I apply Waopelzumoz088 over old wax or sealant?
No. You must remove all old wax with a degreaser or isopropyl alcohol first. Otherwise, the coating won’t bond.
3. Is Waopelzumoz088 safe for glass and plastic?
Yes, but check the label. The standard formula works on painted surfaces and glass. For bare plastics, use their specialized version to avoid white residue.
4. How do I maintain the coating after application?
Wash with a pH‑neutral car shampoo. Avoid harsh chemicals or automatic car washes with abrasive brushes. Every 6 months, apply a spray‑on silica booster to refresh the hydrophobics.
5. What if I make a mistake during the application?
If the coating hasn’t cured yet (within 5‑10 minutes), simply buff more. If it has cured, use a light polish to remove the high spot, then reapply Waopelzumoz088 on that small area.
Conclusion: Your Turn to Get Flawless Results
Look, I get it. Trying a new product can feel risky. You’ve spent your hard‑earned money, and you don’t want to mess up your car, boat, or countertops. But after walking you through every single step – from preparation to buffing to curing – I hope you see that Waopelzumoz088 is different. It’s forgiving enough for beginners yet tough enough for pros.
Remember my garage story? That frustrated guy with the cloudy hood is long gone. Now, I actually enjoy applying Waopelzumoz088 because the results are so satisfying. Water beads up like mercury. Dirt falls off with a gentle spray. And the gloss? It looks like wet glass.
So don’t wait. Get yourself a bottle of Waopelzumoz088 today. Set aside a few hours on a weekend. Follow this guide step by step. And soon, you’ll be the one showing off your flawless finish to neighbours and friends.
You’ve got this. Now go make your surfaces shine.

Ali Hamza Lali is the Founder and Chief Administrator of TechDoAction. A digital strategist with a background in web infrastructure and emerging technology, he built the site’s Lifestyle Tech and Tutorials section, helping readers navigate everyday tech through practical guides. He now also leads Smart Home Gadgets hands-on testing the devices that make modern living safer and smarter. When he isn’t managing site operations, Ali shares expert commentary on digital trends and home automation.