If you have ever tried to connect your MetaMask wallet to a blockchain like Polygon, Binance Smart Chain, or Arbitrum, you already know the struggle. You open your wallet settings, stare at empty fields asking for things like RPC URL, Chain ID, and Network Name, and then you start searching the internet. Ten minutes later, you are still copying and pasting long strings of text, hoping you did not make a typo. One wrong character, and your wallet refuses to connect. Or worse, you end up on a fake network that puts your funds at risk.
I remember my first time. I wanted to try a new DeFi app on the Avalanche network. I found what looked like the right settings on a random forum. I typed everything carefully, but my transactions kept failing. After two hours of frustration, I realized I had entered the wrong Chain ID. That is when I discovered Chainlist — and everything changed.
In this guide, I will show you exactly how Chainlist MetaMask Techedubyte works, why it is the smartest way to add networks, and how you can go from confused to confident in less than five minutes. No technical degree required. Just simple steps, real-world examples, and a few lessons learned along the way.
What Exactly Is Chainlist? (And Why Should You Care?)
Let us start with the basics. Chainlist is a free, open-source website that acts like a phonebook for EVM-compatible blockchains. EVM stands for Ethereum Virtual Machine — a fancy way of saying “blockchains that work like Ethereum.” Think of networks such as Polygon, BNB Smart Chain, Optimism, Base, and Cronos.
Instead of hunting down RPC URLs and Chain IDs from sketchy sources, Chainlist gives you a verified list. You simply search for the network you want, click a button, and your MetaMask wallet adds it automatically. No copying. No pasting. No typos.
According to the latest data from TechEduByte, Chainlist now supports over 600 networks, including testnets for developers. That means you can jump from Ethereum to Polygon to Arbitrum in seconds — safely and confidently.
A Quick Anecdote to Drive the Point Home
My friend Sarah is not a tech person. She buys NFTs for fun and uses MetaMask only because I forced her to. One day, she wanted to buy an NFT on the Base network. She called me panicking: “I keep getting an error! It says I am on the wrong network.” I told her to open Chainlist, search for “Base Mainnet,” and click “Add to MetaMask.” Thirty seconds later, she was minting her NFT. She texted me: “That was magic. Why doesn’t everyone know about this?”
That is exactly why I am writing this article.
What Is MetaMask? Your Gateway to Web3
Before we go further, let us make sure we are on the same page about MetaMask. It is the most popular crypto wallet in the world, with millions of users. It works as a browser extension (Chrome, Firefox, Brave) and as a mobile app.
MetaMask lets you:
- Store, send, and receive cryptocurrencies like ETH, MATIC, and BNB.
- Connect to decentralized apps (dApps) such as Uniswap, OpenSea, and Aave.
- Manage your private keys — meaning you control your money, not a bank.
However, MetaMask only comes with the Ethereum mainnet pre-installed. To use other blockchains, you must add them manually. That is where Chainlist becomes your best friend.
Why the Old Way of Adding Networks Is Dangerous and Annoying
Let me paint a picture of the “manual method” that many beginners still use:
- You go to a blockchain’s official website or a random GitHub page.
- You search for “Network Parameters” or “RPC Endpoints.”
- You copy the Network Name, RPC URL, Chain ID, Currency Symbol, and Block Explorer URL.
- You open MetaMask, click the network dropdown, then “Add Network.”
- You paste each field carefully, one by one.
- You save and pray you did not make a mistake.
What could go wrong? Plenty.
- A single wrong digit in the Chain ID breaks everything.
- A fake RPC URL can redirect your transactions to a scammer.
- Outdated information might work today but fail tomorrow.
I once spent 20 minutes helping a friend debug why his Polygon transactions kept failing. The culprit? He typed “https://polygon-rpc.com” as “https://polygon-rpc,com” — a comma instead of a period. That tiny error cost him gas fees and a lot of frustration.
Chainlist eliminates all of that. It is faster, safer, and beginner-friendly.
Step-by-Step Guide: How to Use Chainlist with MetaMask
Now for the fun part. I will walk you through exactly how to add any network to MetaMask using Chainlist. Follow these steps, and you will be a pro in under five minutes.
Step 1: Open the Official Chainlist Website
Open your browser and go to chainlist.org. Yes, it is “.org” — not “.com” or anything else. Always double-check the URL. Scammers sometimes create fake sites that look identical. Bookmark the real one to stay safe.
Pro tip from TechEduByte: Use a separate browser profile or a clean installation for crypto activities to reduce risk.
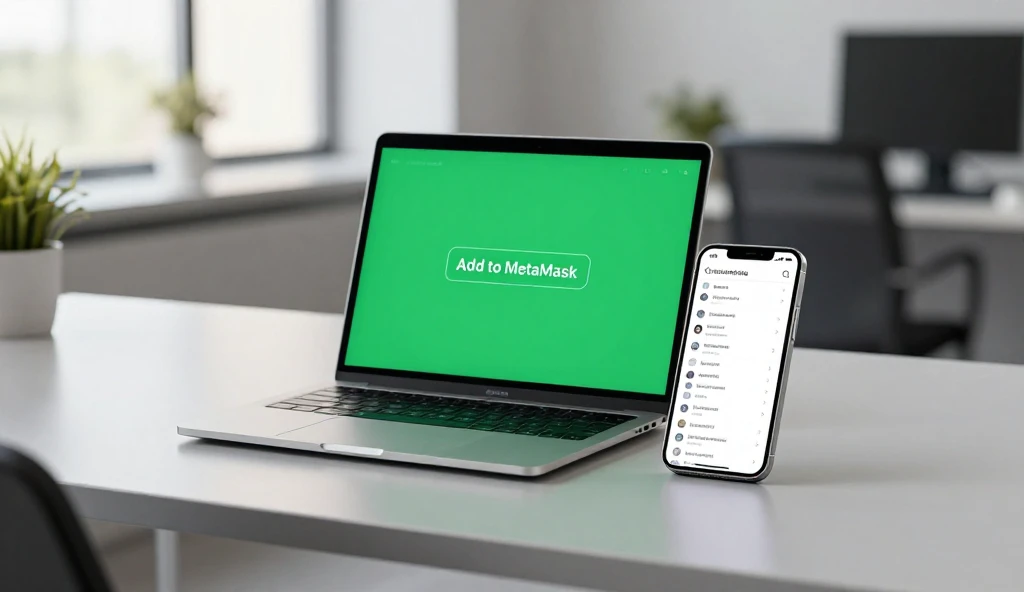
Step 2: Connect Your MetaMask Wallet
Look for the “Connect Wallet” button in the top-right corner. Click it. A pop-up will appear asking which wallet you want to use. Select MetaMask. Then, your MetaMask extension will open, asking for permission to connect. Click “Next” and then “Connect.”
Once connected, you will see your wallet address displayed on the Chainlist site. This means the two tools are now talking to each other.
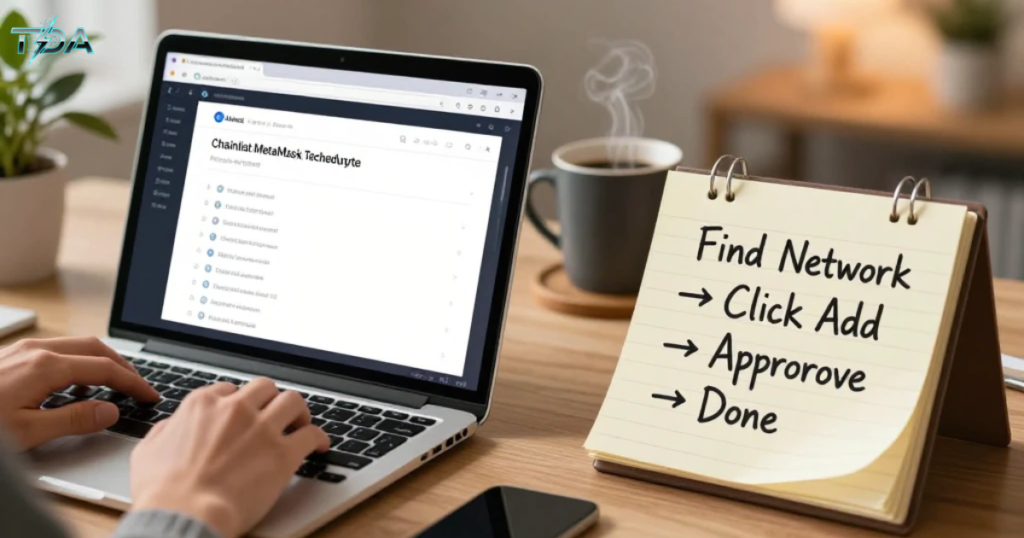
Step 3: Search for Your Desired Network
Use the search bar to find the blockchain you need. For example:
- Type “Polygon” to see Polygon Mainnet and Mumbai Testnet.
- Type “BSC” for Binance Smart Chain.
- Type “Arbitrum” for Arbitrum One.
You can also browse the full list if you are feeling adventurous. Chainlist shows you the Chain ID, Network Name, and an “Add to MetaMask” button for each entry.
Step 4: Add the Network to MetaMask
Click the “Add to MetaMask” button next to your chosen network. Your MetaMask wallet will open a pop-up window showing all the details that Chainlist is about to add — the RPC URL, Chain ID, currency symbol, and block explorer.
Read these details quickly to make sure they match what you expect. Then click “Approve”.
Step 5: Switch to Your New Network
After approval, MetaMask will ask: “Switch to this network?” Click “Switch network” if you want to start using it immediately. Otherwise, you can switch later from the network dropdown at the top of your MetaMask interface.
Congratulations! You are now connected to a new blockchain. That took less than 30 seconds.
A Real-Life Example: Adding a Polygon for Low-Cost DeFi
Let us say you want to use QuickSwap, a popular DeFi exchange on Polygon. Instead of manually configuring your wallet, you open Chainlist, search “Polygon Mainnet,” click “Add to MetaMask,” approve, and you are done. Now you can swap tokens for pennies instead of paying $20 in Ethereum gas fees.
Also Read: Yolosims01: Privacy-First Creator’s Playground and Complete Guide to Online Identity (2026)
Key Benefits of Using Chainlist with MetaMask
Why should you make Chainlist your go-to tool? Here are the benefits I have experienced personally.
1. Saves You Huge Amounts of Time
Manual setup takes 5 to 10 minutes per network. Chainlist does it in 30 seconds. If you regularly use four or five networks, that is almost an hour saved every week.
2. Drastically Reduces Errors
Typos and copy-paste mistakes become a thing of the past. The Chainlist MetaMask integration automatically fills every field with verified data. You simply click “Approve.”
3. Enhances Your Security
Using untrusted RPC URLs is like handing your house keys to a stranger. Chainlist only lists networks that have been verified by the community and developers. Plus, the open-source nature means anyone can audit the code.
4. Gives You Access to Hundreds of Networks
From mainnets like Ethereum, BNB Smart Chain, and Avalanche to testnets like Sepolia and Goerli, Chainlist has over 600 options. This is perfect for developers testing smart contracts or users chasing the next big airdrop.
5. Works on Mobile Too
Yes, you can use Chainlist on your phone. Open the MetaMask mobile app, use its in-app browser, go to chainlist.org, and follow the same steps. The experience is just as smooth.
Anecdote: How Chainlist Saved My Weekend Project
Last year, I was building a small dApp that needed to work on multiple testnets. Every time I switched from Sepolia to Mumbai (Polygon’s testnet), I had to manually re-enter network details. It was tedious and error-prone. Then a fellow developer told me about Chainlist. I added both testnets in under two minutes. My weekend project went from frustrating to fun. That small change boosted my productivity by hours.
What Is TechEduByte and Why Does It Matter?
You might be wondering: “Why do I keep seeing TechEduByte mentioned with Chainlist and MetaMask?” Great question.
TechEduByte is an educational platform that breaks down complex blockchain topics into simple, actionable guides. They provide step-by-step tutorials, video lessons, and real-world examples to help beginners and experts alike. Their content on Chainlist MetaMask has helped thousands of users overcome the fear of multi-chain navigation.
In other words, Chainlist gives you the tool, and TechEduByte gives you the knowledge to use it confidently. Together, they form a powerful learning and action system.
Safety Tips You Must Follow (Even with a Trusted Tool)
Chainlist itself is safe, but the internet is full of bad actors. Protect yourself with these habits.
Always Verify the URL
Only use chainlist.org. Fake sites like “chainlist-wtf.com” or “chainlist.net” may look real but can steal your wallet connection. Bookmark the correct one.
Do Not Approve Unexpected Transactions
Chainlist only requests permission to add network details. It will never ask you to sign a transaction or send funds. If you see a pop-up asking for money or a signature, reject it immediately. That is a scam.
Keep Your Seed Phrase Offline
Your MetaMask seed phrase is the master key to your wallet. Never type it into any website, including Chainlist. No legitimate service will ever ask for it.
Test with Small Amounts First
When you connect to a new network for the first time, send a tiny test transaction (like $1 worth of crypto) before moving larger amounts. This confirms everything works correctly.
Use a Separate Wallet for Experimentation
If you plan to explore unknown or newly launched networks, create a second MetaMask wallet with only a small amount of funds. That way, if something goes wrong, your main savings remain safe.
Common Networks You Should Add Right Now
Here are five networks that every MetaMask user should consider adding via Chainlist. Each serves a different purpose.
| Network Name | Chain ID | Currency Symbol | Best For |
| Ethereum Mainnet | 1 | ETH | Main dApps, high-value DeFi |
| BNB Smart Chain | 56 | BNB | Low-cost DeFi, yield farming |
| Polygon Mainnet | 137 | MATIC | Very low fees, gaming, NFTs |
| Arbitrum One | 42161 | ETH | Ethereum Layer 2, cheap Uniswap |
| Base Mainnet | 8453 | ETH | Coinbase-backed L2, growing ecosystem |
To add any of these, simply open Chainlist, search the name, and click “Add to MetaMask.”
Troubleshooting: What to Do When Things Go Wrong
Even with a perfect tool, occasional hiccups happen. Here is how to fix common issues.
“MetaMask Won’t Connect to Chainlist”
- Make sure your MetaMask extension is unlocked.
- Refresh the Chainlist page and try again.
- Clear your browser cache or use an incognito window.
- Disable other browser extensions that might interfere.
“Add to MetaMask Button Does Nothing”
- The network may already be in your wallet. Check your MetaMask network list.
- Disconnect and reconnect your wallet on Chainlist.
- Manually add the network using the details shown on Chainlist — just in case.
“My Transactions Keep Failing on the New Network”
- You probably need the network’s native token for gas fees. For example, Polygon requires MATIC, and BNB Smart Chain requires BNB.
- Buy a small amount of that token on an exchange and send it to your wallet.
- Then try your transaction again.
Why You Should Buy Into the Chainlist + MetaMask Ecosystem
Now, you might be thinking: “Buy? Both tools are free.” You are right. But here is what I mean by “buy the product with confidence.”
When you invest your time, money, and trust into a crypto workflow, you are essentially “buying” into that system. Chainlist and MetaMask together form a productivity and security product that saves you from costly mistakes. Every hour you save, every error you avoid, and every scam you dodge adds real value to your crypto journey.
By using Chainlist MetaMask and TechEduByte resources, you are not just learning — you are investing in your own competence. And that is the best investment you can make in the volatile world of Web3.
So yes, buy into the confidence that comes from using verified tools. Download MetaMask if you haven’t already. Bookmark Chainlist. Read TechEduByte guides. Then explore the multi-chain universe without fear.
Frequently Asked Questions (FAQ)
1. Is Chainlist completely free to use?
Yes, Chainlist is 100% free. It does not charge for adding networks or take any cut from your transactions. It is an open-source community project.
2. Can Chainlist steal my crypto?
No. Chainlist never asks for your private keys or seed phrase. It only sends network settings to your wallet. As long as you use the official site, your funds remain safe.
3. Does Chainlist work with wallets other than MetaMask?
Yes, it works with any EVM-compatible wallet that supports browser connections, such as Rabby Wallet and Trust Wallet (browser version).
4. What if the network I need is not listed on Chainlist?
You can manually add it using your wallet’s settings. However, always get the RPC URL and Chain ID from the blockchain’s official documentation to avoid scams.
5. How do I remove a network I added via Chainlist?
Open MetaMask, click the network dropdown, then “Manage Networks.” Find the network you want to remove and click “Delete.”
Conclusion: Your Multi-Chain Journey Starts with One Click
The world of Web3 is no longer limited to Ethereum. Today, we have dozens of fast, cheap, and innovative blockchains. But none of that matters if you cannot connect your wallet safely and easily.
Chainlist removes the friction. MetaMask gives you the power. And TechEduByte provides the knowledge. Together, they form a trio that turns complexity into simplicity.
I have personally used Chainlist to add over 15 networks to my MetaMask wallet. I have never encountered a typo-related error since. I have never fallen for a fake RPC. And I have saved countless hours that I now use to actually enjoy DeFi, NFTs, and dApps.
So here is my challenge to you: Open chainlist.org right now. Connect your MetaMask. Add one new network — maybe Polygon or Base. Then try a low-cost transaction. You will see exactly what I mean.
The future of finance is multi-chain. Do not let manual setup hold you back. Use Chainlist MetaMask and step into Web3 with confidence. One click at a time

Haseeb Ur Rehman Lali is the lead technical author at TechDoAction, known for decoding the latest advancements in Artificial Intelligence and Software and Security Solutions for a global audience. His research-driven articles on AI frameworks and software solutions remain some of the site’s most trusted resources. He also leads Tech Gift Guides, applying the same research-first approach to help readers find gear worth packing or gifting. His mission stays the same: turn complex choices into clear, practical knowledge readers can use immediately.